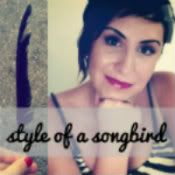
Hello fellow
Style of a Songbird readers! My name is
Amy and I blog over at
Fate-Filled Times. I'm thrilled to be meeting you here on Erica's wonderful blog.
 |
| Hello there! |
I've recently learned that Erica and I have a common love for Art Journaling.
We thought it would be fun to explore our techniques and inspiration on each others blogs--especially for those who feel they just don't know where to start.
It can be really intimidating to stare down at a blank page wondering how to turn it into a personal expressive space that's decorated to your liking.
Here is a step-by-step tutorial to share how I create an Art Journaling page from beginning to end. I hope to share how easy it can be to fill a page without feeling intimidated by it.
First, start by finding a great journal. There are so many options!
Here are some of my favourites:
*A great vintage find from a thrift shop or a family member's attic
*A brand new journal you are drawn to in a book store
*A used book that can be re-purposed (I know Erica is great at this!)
*A book you make and bind yourself. There are many great binding tutorials online.
To make a page interesting, add some colour. There are many ways to do this. For this particular page, I
first used a warm tea bag to stain a portion of the page. Simply rub the tea bag on the page until you achieve your desired shade.
Second, I used watercolour paint to fill in some of the spaces.
Third, I sprayed some Glimmer Mist on the page, which sprayed poorly to be honest and left more of a puddle rather than a mist. Oh well! It's important to go with the flow.
Next, let's figure out what to write. I happened to put on a record by
Raffi (a popular Canadian musician for children when I was growing up) and was inspired by one of his songs I had never heard before. It is called "Thanks a lot". It is an ode to Thanksgiving, so I felt the timing was suitable. Our Thanksgiving was celebrated on October 8th, but I know American Thanksgiving will be celebrated on November 22nd.
Happy Thanksgiving!
Instead of writing my own words, I thought I would write Raffi's words. This is a great way to journal when you feel uncertain about what to write. I used pencil, but you could use any type of writing instrument you prefer. Writing can be intimidating, and so I find using quotes, lyrics, snippets from stories or books to be a great way to begin.
Next, it was time for more colour and texture. My lovely friend
Annika sent me some wonderful victorian style ephemera in a recent gift package and I decided to dive in and use some of it. I have a bit of an obsession with victorian roses, so I cut out three of them and glued them to the page wherever they seemed to fit that was appealing to my eye.
Don't be afraid to play! Place them upside down, scatter them, even cover up some words with them. It's fun to try different possibilities and see what pleases
your eye the most.
Next, I added some decorative tape to the bottom of the page for added colour and texture and accented it with some blue glitter glue. I love using glitter paints in my art, but I'm not as big a fan of loose glitter. It just seems to make a mess! If you don't have these types of products, you could used a piece of coloured paper to accent the edge and markers to enhance the edge.
Your materials do not need to be expensive or fancy. I find many of my supplies at thrift stores.
For some added interest, I added a vintage pattern. I found arrows and decided to glue them to the top of the page. I played with directions and balance and decided I like the look of them crossing each other. I glued these to the page and then outlined them roughly with pencil.
The finishing touch was added using stamps. This created a title for the page. Since this page is all about being thankful, I titled it Thank You. I have a great love for alphabet stamps. I think they are really enjoyable to use and they look great. I am not afraid to make mistakes with them, either.
I find my art is one place where I do not allow my perfectionist tendencies to thrive. I push them aside and go with the flow. It is much more meditative and relaxing that way.
Any "mistake" is just an added element on the page. If you look closely, you will see some smudges on the final page. I had a bit of a slip with the glue and made a bit of a mess! I tried to fix it to no avail and now it is simply a part of the final look.
And, here is the final product:
I hope this peek inside my process will help you to feel inspired to make your own journal page...and maybe even a whole book!
I truly believe Art Journaling is all about the journaler, and this means every bit of your personality adds elements unique to you. Whatever flows out of you naturally is exactly what others are drawn to.
If you decide to create a journal page, please share it with us!
And, a big thank you, Erica, my fellow Art Journaler, for hosting me on your blog.
{
Amy, thank you for sharing a peek into your process with us. You are a beautiful & brave soul and I'm so glad our paths have crossed.}


